Bicycle Wheel Truing | How to True Your Bicycle Wheel
Bicycle wheel truing may seem like it is an impossible artform, but with a little bit of knowledge, some judgement and forethought, it is possible for anyone to true their bicycle wheel.
Before you attempt this, you will need a few basic tools. The first is a spoke key. Park makes the best spoke around and Sapim have a pretty decent one also. Make sure your spoke key fit the nipples snug otherwise they will round off.
A bicycle wheel truing jig is the second bit of equipment you will need. If you are doing it in your bike, you can also use your brake pads to line it all up.
Step 1
Start by removing your tyre and tube and check that your hub axle turns freely with little or no play. However note that a skewer’s clamping force takes a little bit of movement out of the bearings because they all compress them slightly.
Step 2
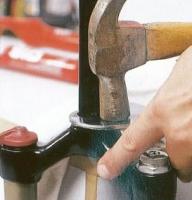
Next check for dents in the walls. These can often be removed quite successfully with an adjustable wrench and a gradual approach. If you go to far then lay the rims opposite side on a flat surface and tap it back in with a hammer.
Once your rim is as straight as you can get it lay a fine file flat on the rim wall and smooth back any irregularities you find, working in the same direction as the rims rotation.
Finish the job by doing the same thing but with the file wrapped in some fine emery paper.
Be careful to take as little of the rims surface as possible or it could become a safety concern. Be sure to check the wall thoroughly for cracks when inflating the tyre! Remember – this is all done at your own risk.
Step 3
Check around the rims eyelets for cracks (good rims have eyelets to eliminate binding and distribute load better). Another place to check is the brake wall. It can crack when it becomes worn and thin. If you find any cracks in any of these areas then stop right now and go and get a replacement rim. Cracks are a sign that failure is not far away anyway.
Step 4
Lube the spoke nipples where they meet the rims eyelets with a Tri flow like product to minimise binding when truing. Spin the wheel to help the lube penetrate right in.
Step 5
Now it is time to check for any loose, damaged or broken spokes and replace them 1-by-1. Bring them up to the same tension as the spokes on that side of the wheel (feel with your fingers how tight they are). Scratched or bent spokes are potential failure items so replace these also.
When replacing a spoke that has broken at the elbow, consider this a temporary fix as it is likely that more will suffer the same fate. This is a fatigue problem most likely and can only by truly fixed via a respoke. This is often caused by poor quality spokes and or a poor fitting of the spoke head to the hub flange.
Step 6
Finally! Time to start the actual bicycle wheel truing. It is most likely that your rear wheel needs truing so this method will be explained in terms of the rear wheel. It can be adapted to the front wheel though.
Most rear wheels will have approximately double the tension on the flatter drive side than the more angles non drive side.
Tightening (anticlockwise) a spoke on the non drive side (say half a turn) of a wheel pulls it across to the non drive side approximately twice the amount that the same half a turn would of if you did it to a drive side spoke. Remember this! The non drive spokes have double the effect of the drive spokes.
Step 7
Line up the guides of the truing stand right up close to a perceived “true” section of the wheel. Then rotate the wheel and take note as to where the rim pushes up against the guide and which spoke is directly above the beginning and end of the buckle. It is usually a good idea to mark this with some tape or a marker.
As an example, lets say the wheel was out towards the non drive side a good bit and it was spread across five spokes, three non and two drive side. You would start by tightening the two drive side spokes half a turn, and then checking the displacement (which should not be less). Next back off the three non drive side spokes a quarter turn and check the displacement with the guides.
You should find that only the centre of the buckle remains. Continue to use this pattern of adjustment eventually going down to one quarter and one eighth turns as the buckle becomes less.
Use your guides to narrow down which spoke (or 2 spokes) are still offending and tighten or loosen accordingly.
Unfortunately this can only be used as a guide. There is a certain knack for knowing which spoke to tweak and this comes with a mix of commonsense and experience.
Step 8
To remove a flat spot you use much the same method. Set the guides up against the underside of the rim and work out where the rim looses contact with the guide and which spokes are above this.
Loosen the spokes in a 1:2 ratio (i.e. 1/2 turn drive: 1/4 turn non drive) reassessing which are the remaining “offending” spokes with the guides each time.
Step 9
A high spot is the opposite of a flat spot. To fix a high spot do the opposite of Step 8.
Step 10
Dishing (the centring of the rim between the hub axle ends) should be checked with the appropriate tool after the wheel is true. However the truth is that you should not need to with only a bit of minor backyard bicycle wheel truing having gone on it is unlikely to have been effected to any degree. Something to keep in mind though.
Step 11
Stress relieving a wheel is most important for letting the spokes you’ve just worked on unwind and settle. This is done by lightly side loading the wheel on both sides until all “pinging” of the spokes ceases. Do this gently as wheels are at their weakest under side loads like this.
Put the wheel back in the jig and check that it is still true. You may find that is has come out of wack a little and you need to repeat some of the above steps again but to a lesser degree this time.
Step 12
Repeat all of the above steps until you once again have a straight wheel. If it doesn’t work, you have either stuffed up, or were fighting a losing battle against a severely bent rim. If this is the case, take your “creation” to your local bike shop for some damage assessment.
Step 13
When it comes to bicycle wheel truing for your front wheel it will true up a little more easily with the spokes on each side of the wheel having the same effect when tweaked the same amount, Disc front wheels can be treated the same as rear wheels (remember 1:2).
Step 14
We now come to the last step in bicycle wheel truing… it is a good idea to use a “low” strength thread sealant or loctite on the threads of the spokes to seal the threads off from mother natures worst so as the spokes don’t fuse onto the nipple in the long term.
This is not to keep spokes from coming loose as a properly built wheel won’t acquire loose spokes. It is merely to enable you to adjust them again a year or 2 down the track.